¶ 1.1 What's THMC
THMC is a powerful graphical user interface for setting, running, and visualizing a coupled numerical simulation of thermal transport (T), liquid flow (H), geochemical kinetic/equilibrium reactions (M), and solute transport (C) in saturated-unsaturated porous media in two or three dimensions.
- Firstly, the platform provides a mesh generation tool for creating the spatial distribution of finite elements and nodes for THMC simulations. It features multiple interactive selection tools that allow users to set up initial and boundary conditions.
- Secondly, the platform provides an interactive table form for easily setting up all inputs, allowing users to configure a variety of variables in each module. It offers default values, options with clear labels, and editors for hierarchical input, replacing the tedious task of manually editing those variables in plain text.
- After running the simulation, the platform helps users visualize the output, including the spatial distribution of pressure head, total head, velocity fields, and moisture contents; temperature and thermal flux; chemical concentrations as a function of time, as well as the distribution of all chemical species at user-specified nodes, and chemical fluxes; and displacements, stresses, and deformations.
¶ 1.2 Getting the THMC software
¶ 1.2.1 System Requirements
To run the latest version of THMC, you will need the following system pre-requisites:
| System | Requirements |
|---|---|
| Operating Systems | Windows 10, 11 or later version (only supports Windows OS currently) |
| CPU | 64-bit |
| Storage | At least 2 GB of available space |
| Memory | 8 GB or more RAM |
¶ 1.2.2 How to get THMC software
¶ Purchase a commercial version of THMC:
-
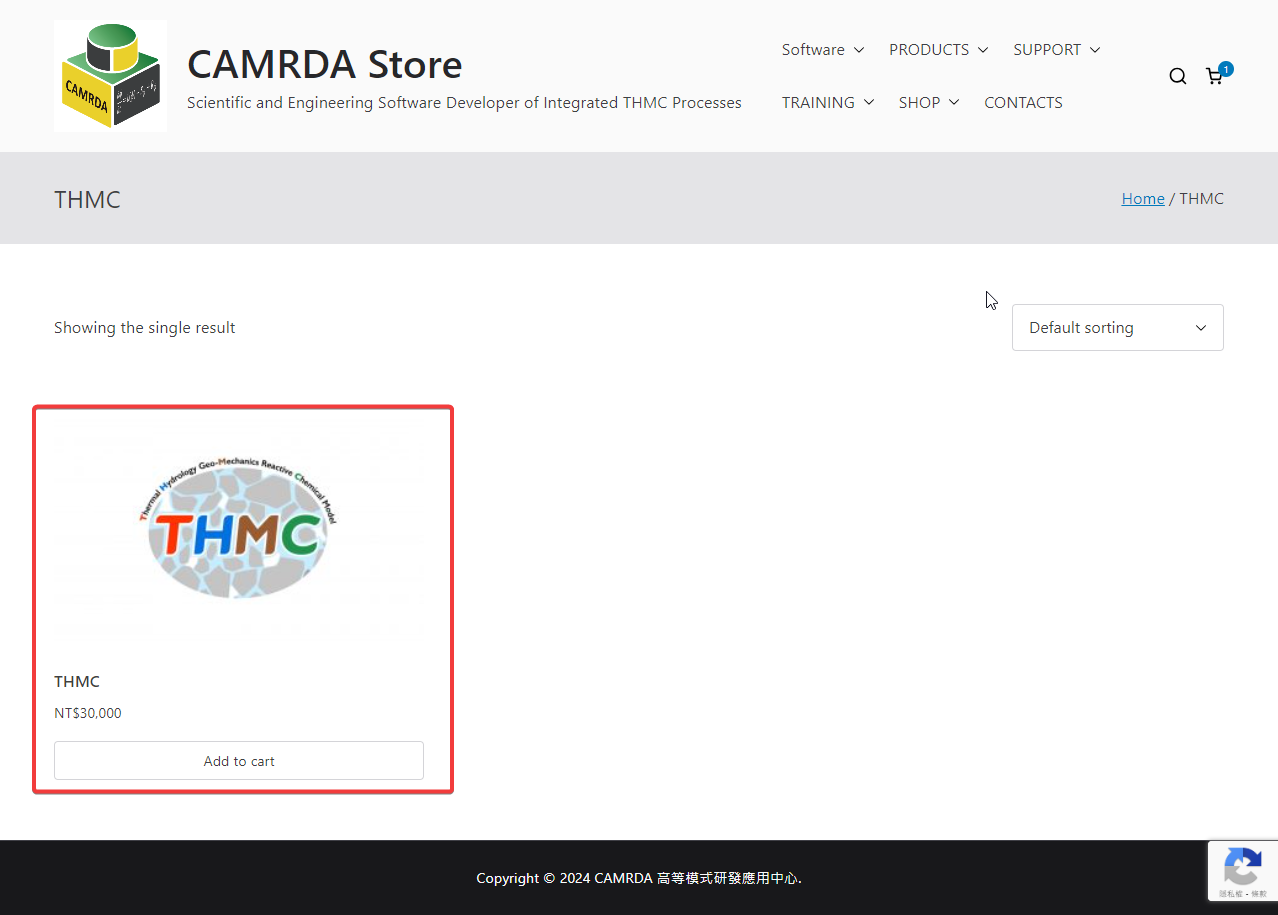
You can buy THMC through the shopping cart on our website using a credit card. https://camrdaprod.ncu.edu.tw/product-category/thmc/

Fig. 1.2.2: Purchase THMC -
After the purchase is completed, you will receive an email with a download link. Please download the file through the provided link.
If you have any questions, please join Line group to get fast response,
https://line.me/ti/g2/dMfrBGx6pRjfYVjXCMMwojRBRfTLBJ_xhz79aQ?utm_source=invitation&utm_medium=link_copy&utm_campaign=default
¶ Download a trial version of THMC:
-
Alternatively, you can download a trial version of THMC from our website. https://camrdaprod.ncu.edu.tw/products-landing/thmc/download-a-free-trial-of-thmc/
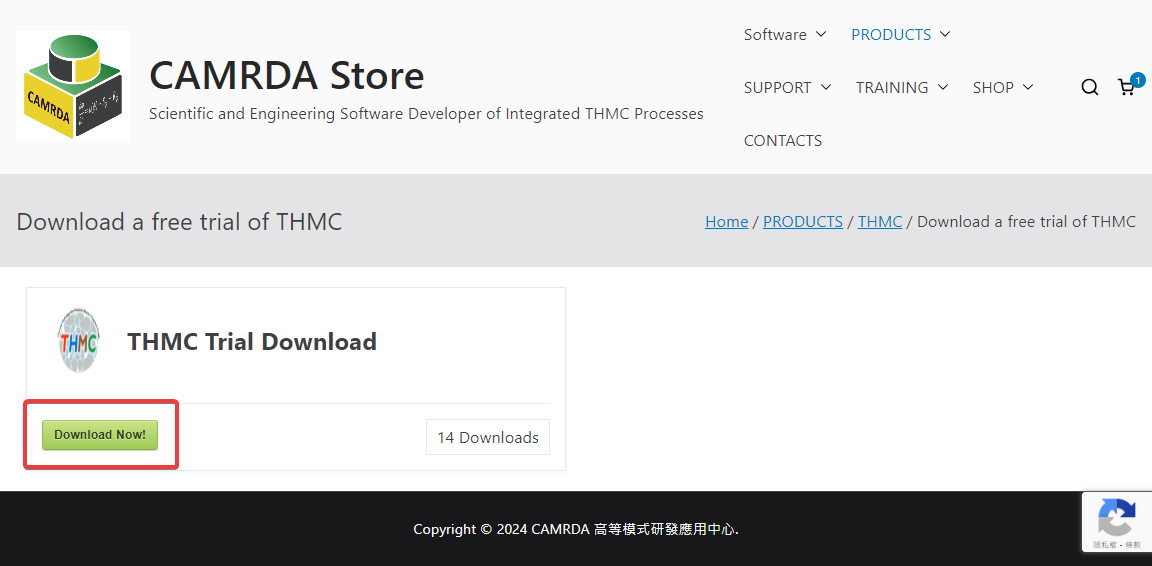
Fig. 1.2.3: Download Free Trial
The trial will expire after one month. To extend the trial, please purchase our commercial version.
¶ 1.2.3 How to install upgrade THMC
- Download the THMC zip file to your PC's storage.
- If you had registed (have license), please backup license.lic in THMC folder and copy back to THMC folder after you had upgrade the THMC.
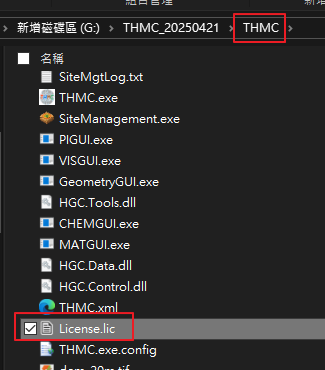
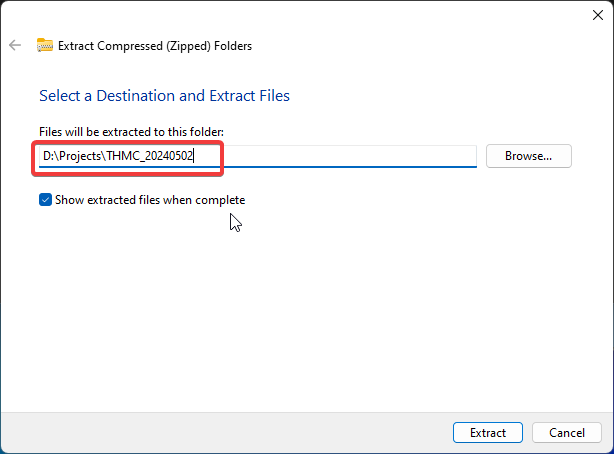
Make sure the path of the location consists only of numbers, alphabetical characters, and basic symbols (such as
_,-). Special characters are not allowed.
¶ 1.2.4 How to start THMC
-
Navigate to the directory where the zip file was extracted and find "THMC.exe".
-
Double-click the "THMC.exe" to start THMC.
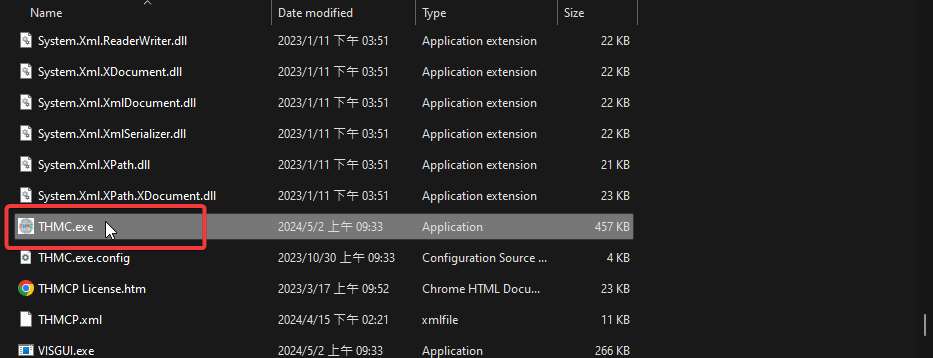
Fig. 1.2.6: Double-click the "THMC.exe" to start THMC
¶ 1.2.5 How to register the product
If you have just purchased the commercial version of THMC, you must register your product before using it.
-
Click
Help->Registerto start the registration process.
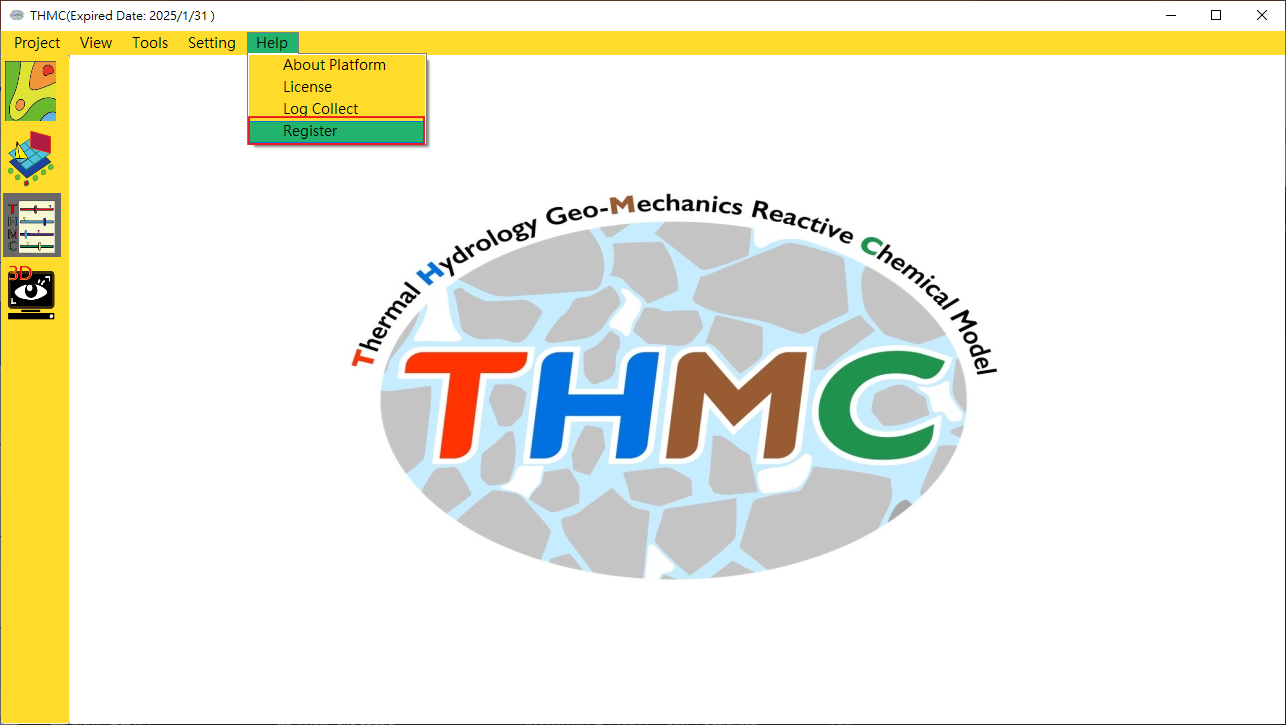
Fig. 1.2.7: Register button under Help menu -
Email the UID to our service team (
CAMRDA@g.ncu.edu.tw). They will reply with the license string. Paste the license string into the license window and clickOKto complete the registration.
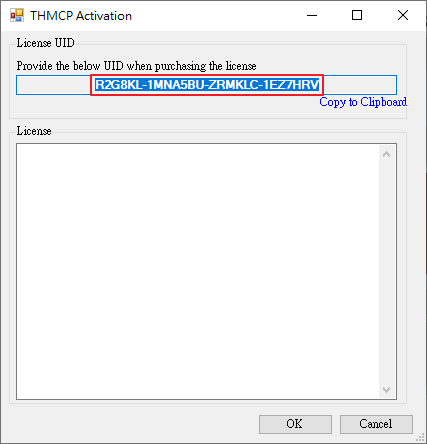
Fig. 1.2.8: Enter the license code
¶ 1.3 Graphical user interface of THMC
¶ 1.3.1 THMC Application Overview
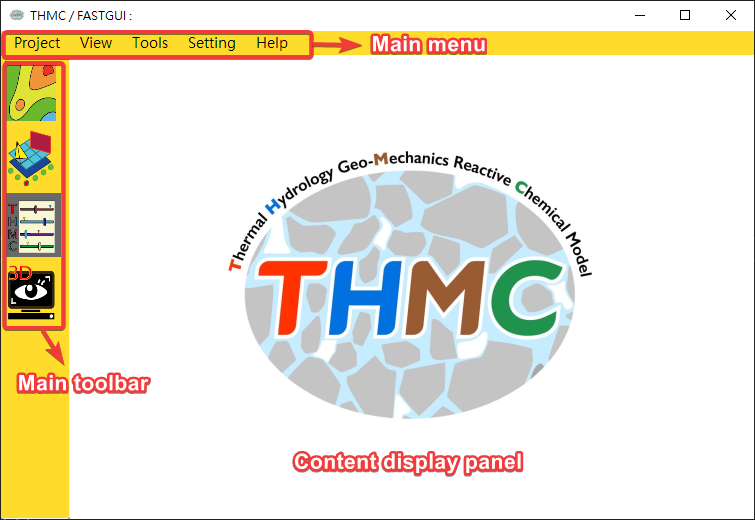
The startup screen consists of the following components:
- Main Menu
- Main Toolbar
- Content Display Panel
¶ 1.3.2 Main menu
At the top of the screen, you'll find the main menu, which provides project-based operations across all modules. There are six menu items: Project, View, Tools, Settings, Language, and Help.

¶ 1.3.3 Main Toolbar
Positioned on the left side of the window, the main toolbar offers access to the links of the four core modules of THMC. After you click on the icon of a module, the Content Display Panel will switch to the corresponding module. There are four main modules, and here is an introduction to the function of each module:
| Icon | Name | Description |
|---|---|---|
| Site Hydrogeology Information | This module offers an overview of a site, enabling the creation of interpolations from data points and the generation of geological models using borehole data. | |
 |
Geometry Mesh | This module provides CAD-like features, enabling the creation and editing of 2D and 3D meshes for THMC, as well as geometric grouping for initial and boundary conditions. |
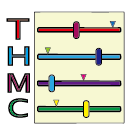 |
Model Parameter Input & Simulation | This module serves as the central configuration and execution component for THMC numerical simulations. It offers well-structured interfaces for defining material properties, initial values, boundary values, time step sizes, and specifications in the thermal, hydrological, mechanical, and chemical modules within THMC. |
 |
Visualization | This module converts the numerical simulation results from binary files into animated contour plots for each time step and variable in the simulation. |
¶ 1.4. THMC Project Operation
THMC provides a project framework that allows users to save all inputs, meshes, and visualization data inside a single folder, making it easy to share or archive the project.
¶ 1.4.1 Project Structure
THMC allows you to create multiple projects. All projects in THMC can be found under the Project folder in your THMC extracted path. Here is a sample project structure of THMC, using Project_1 as an example. The platform will save mesh-related data in the Mesh folder. Most input settings will be integrated into the Solver folder. And the results of the simulation will be in the Output folder under the Solver/HGC4.3 (or HGC5.3) path.
.
└─THMC/
    ├─ Project/
    │   ├─ Project_1/
    │   │   ├─ Mesh/
    │   │   ├─ Solver/
    │   │   │   └─ HGC4.3 (or HGC5.3)/
    │   │   │       ├─ Output/
    │   │   │       ├─ SIM.inp
    │   │   │       └─ SIM.dm
    │   │   └─ Project.xml
    │   ├─ Project_2/
    │   ...
¶ 1.4.2 Create a New Project
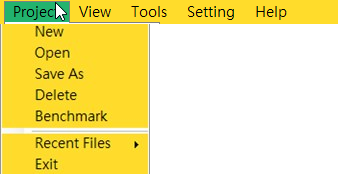
To start a new project, move to the Main Menu and select Project → New.
- In the
Project Nametext field, enter the project name.
Again, make sure the
Project Nameconsists only of numbers, alphabetical characters, and basic symbols (such as_,-). Special characters are not allowed.
-
In the
Modelfield, selectTHMC2Dif you are going to run a 2D THMC simulation. SelectTHMC3Dif you want to run a 3D simulation. -
Click
Confirm. The new project will be created and opened.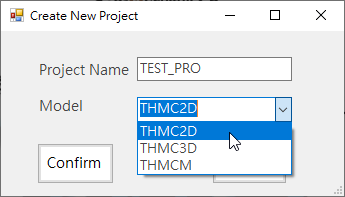
Fig. 1.4.3 Create New Project. -
The new project will be saved to the
Projectfolder under your THMC extracted path.
¶ 1.4.3 Open a Saved Project
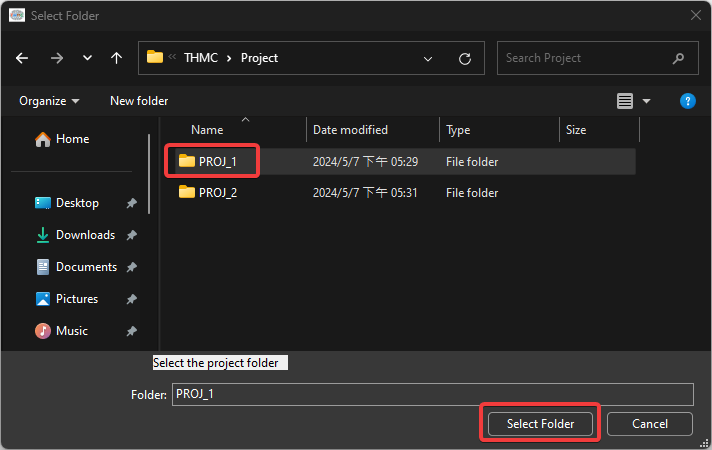
If you want to open an existing project:
- Move to the Main Menu and select
Project→Open. - Then select the root path of the project you want to open.
¶ 1.4.4 Save and Share Project
-
Any changes to your settings in THMC will be automatically saved to your current project structure.
-
You can zip the entire project folder that you want to share, then transfer the zip file to others.
If you want to save the current project as a new project, move to the Main Menu and select
Project→Save as.
¶ 1.5 Log Collect
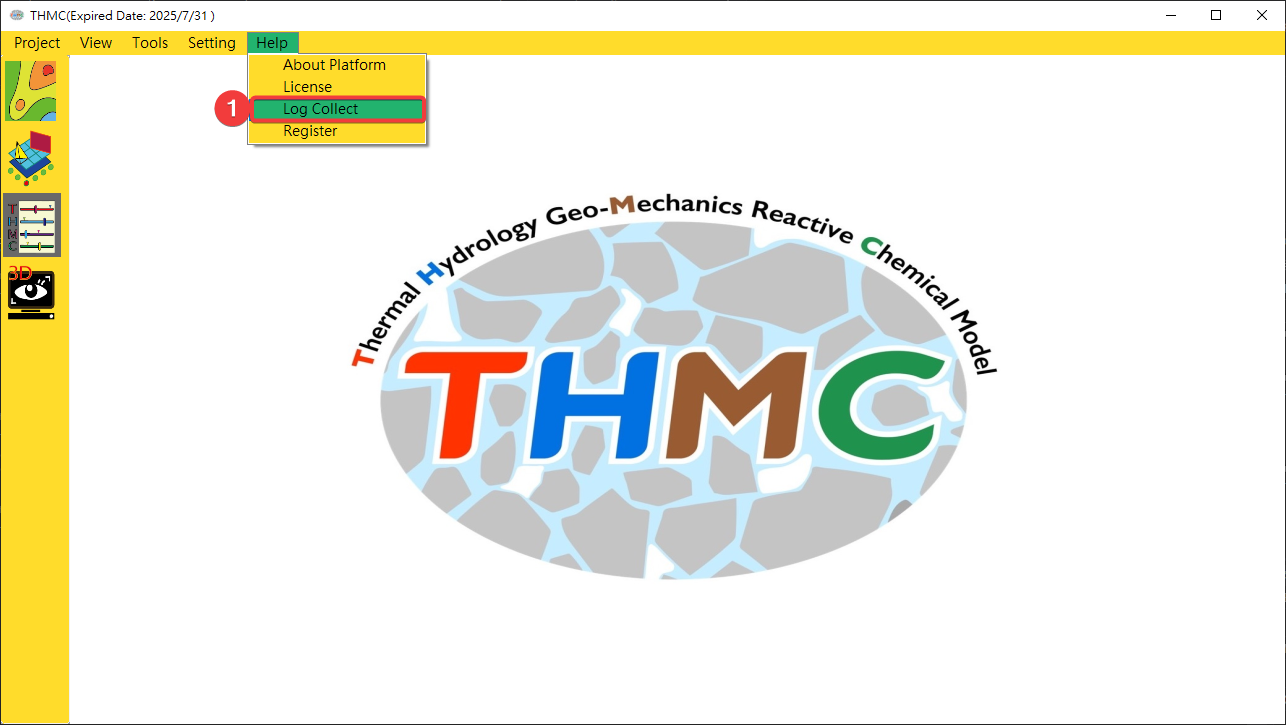
When you have trouble and need to provide project folder data , follow these steps:
- Click
Help\Log Collectto start the log collect form.
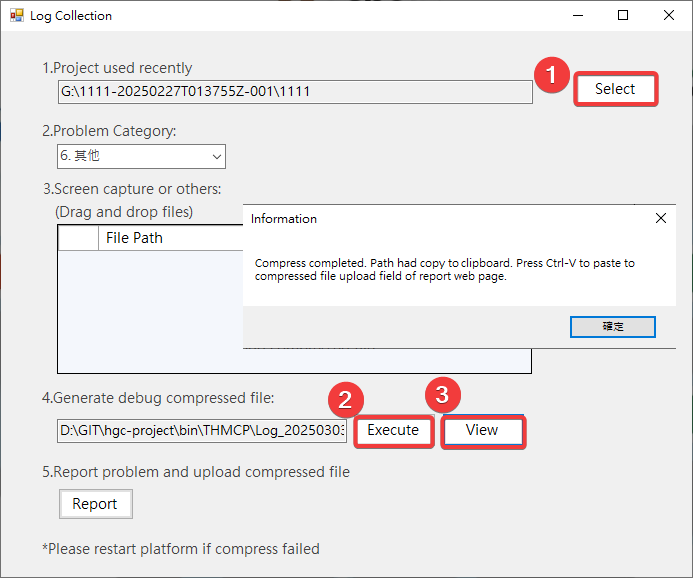
- Click
Selectto choose project folder, then clickExecuteto generate zip file, then clickViewto open zip file folder. Then you can upload the zip file to cloud drive and provide the url.
¶ 1.6 Benchmarks
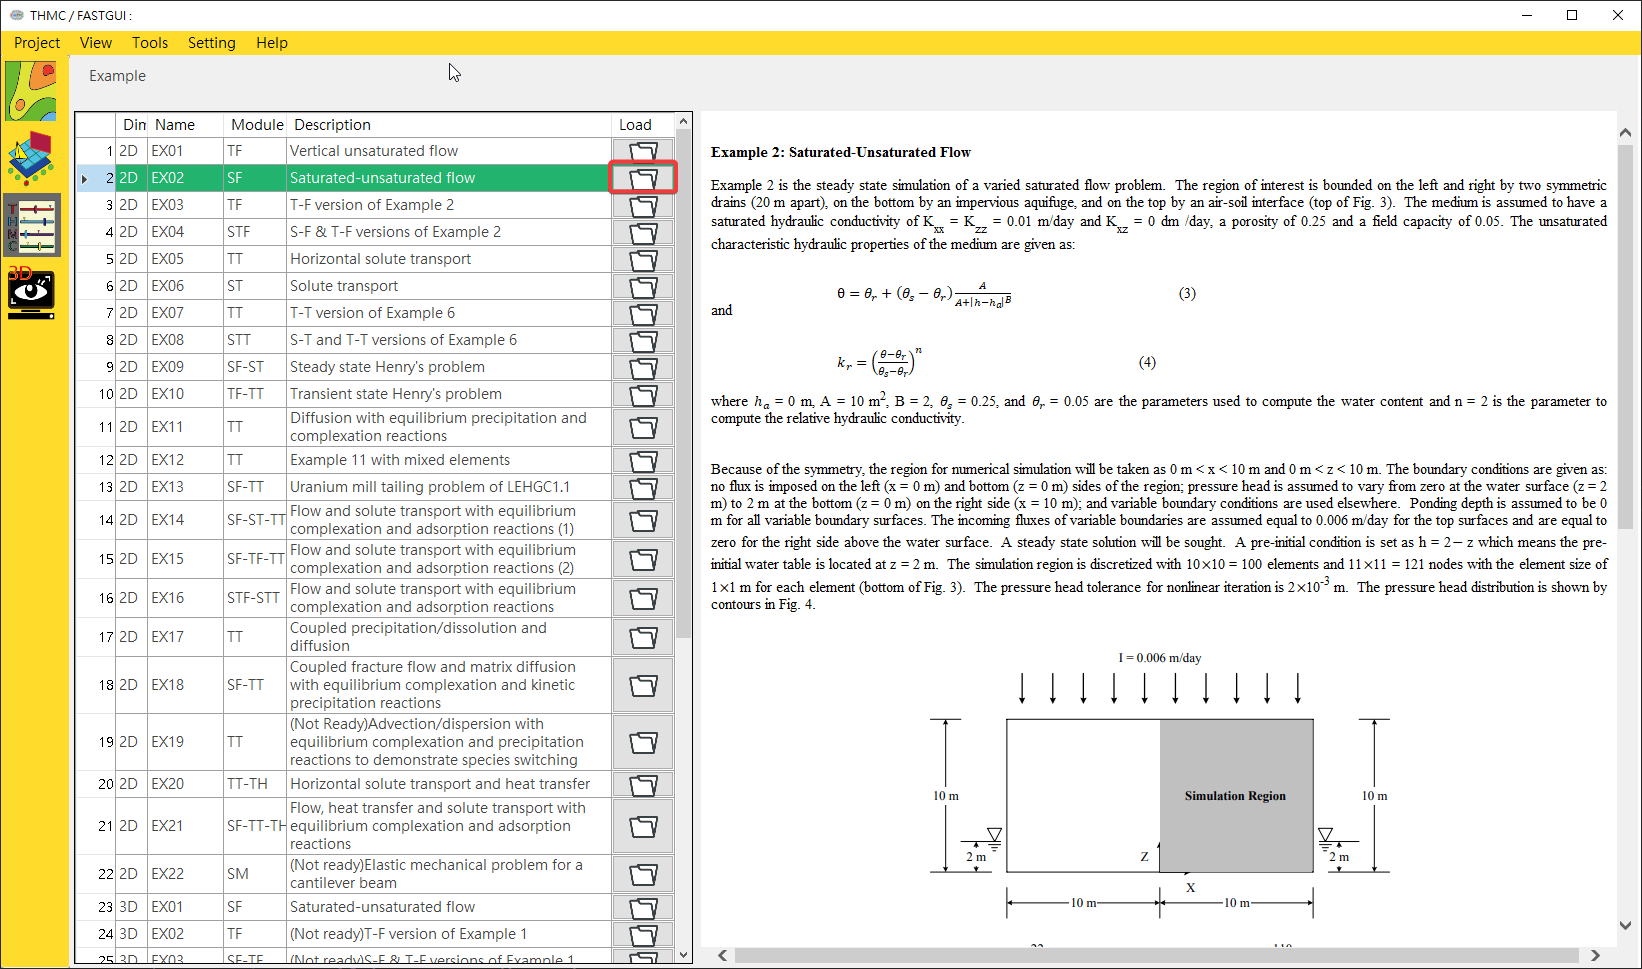
THMC provides 37 benchmarks to demonstrate the capability of THMC to solve a variety of mixed subsurface flow, solute transport, and chemical reaction problems. To open the benchmarks panel, follow these steps:
- Click
Project→Benchmark. The left part of the panel will show a brief description of each example. - Select an example from the list of benchmarks. The right panel will display the detailed description containing background information and an explanation of the modeling scenario.
- Then click the
Load:material-folder-open: button on the selected example row. It will automatically run the simulation and then open a visualization window.
